- why-make-your-own-body-spray
- basic-ingredients-for-diy-body-spray
- step-by-step-guide-to-creating-body-spray
- customizing-scents-to-match-your-style
- real-life-stories-of-diy-fragrance-success
- tips-for-storing-and-using-homemade-body-spray
- how-scent-snob-supports-your-diy-journey
1. Why Make Your Own Body Spray
Creating your own body spray at home isn’t just about saving money—it’s about personal expression. Many commercial sprays are filled with synthetic chemicals, which can cause irritation or simply lack uniqueness. When you learn how to make your own body spray at home, you gain complete control over the ingredients, ensuring the scent matches your mood, style, and even your skin’s sensitivities. Beyond practicality, there’s also a sense of accomplishment that comes with designing something truly yours.
2. Basic Ingredients for DIY Body Spray
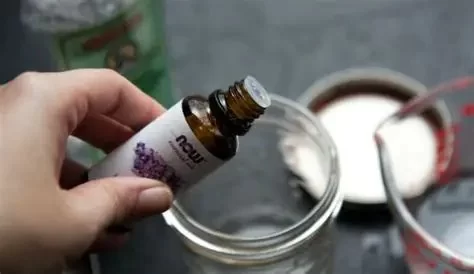
To get started, you’ll need a few essentials: distilled water, witch hazel or vodka (as a preservative and base), and essential oils for fragrance. Distilled water keeps the solution clean, while witch hazel helps the oils blend smoothly. Essential oils are where the magic happens—lavender for relaxation, citrus for freshness, or sandalwood for depth. Many crafters also add a few drops of glycerin for a moisturizing effect. These simple ingredients make DIY body spray both affordable and customizable.
3. Step-by-Step Guide to Creating Body Spray
3.1 Measuring the Ingredients
Start with a small glass spray bottle, ideally amber-colored to protect the oils from light. Fill two-thirds with distilled water, add two tablespoons of witch hazel or vodka, and then blend in 15–20 drops of your chosen essential oils.
3.2 Mixing and Testing
Shake the bottle gently to combine the ingredients. Spray once on your wrist to test the scent. If it feels too strong, dilute with more water; if too weak, add a couple more drops of oil. The beauty of making your own body spray at home is the flexibility to adjust until it feels perfect for you.
4. Customizing Scents to Match Your Style
One of the joys of DIY body spray is personalization. For example, you could create a “morning energy” blend with grapefruit, peppermint, and lemon oils, or a “romantic evening” spray with rose, vanilla, and jasmine. Seasonal variations are also fun—spicy cinnamon for winter, or ocean-inspired eucalyptus for summer. Many people even design signature scents to reflect their personality. Crafting these blends allows you to express yourself in ways store-bought sprays never could.
5. Real-Life Stories of DIY Fragrance Success
Take Emily, a college student in California, who began making her own sprays to avoid allergic reactions from commercial products. Soon, her unique lavender and bergamot blend became a hit with her friends, sparking a small side business. Or consider James, a father of two, who makes calming sprays with chamomile and cedarwood for his kids’ bedtime routine. These stories show how learning how to make your own body spray at home can become more than a hobby—it can transform into a lifestyle or even a small entrepreneurial venture.
6. Tips for Storing and Using Homemade Body Spray
Proper storage is key to maintaining freshness. Keep your spray in a cool, dark place, and always use glass containers to avoid chemical reactions with plastic. Shake before each use to redistribute the oils, as natural separation is normal. Typically, a homemade body spray lasts about 1–3 months, depending on storage conditions and ingredients. For best results, make smaller batches more often. This way, you’ll always enjoy a fresh and vibrant scent.
7. How Scent Snob Supports Your DIY Journey
At Scent Snob, we believe fragrance should be as unique as the person wearing it. That’s why we provide high-quality essential oils, spray bottles, and blending kits for those eager to learn how to make their own body spray at home. Whether you’re experimenting with your first recipe or perfecting a signature blend, we’re here to supply the tools and inspiration. Our goal is to help fragrance lovers embrace creativity while ensuring their DIY journey is safe, enjoyable, and stylish.


0 comments