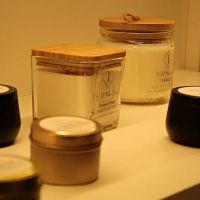
How to Make Your Own Wellness Candles - A Step-by-Step Guide to DIY Wellness Candles
- Choosing the Right Materials for Your Wellness Candles
- Preparing Your Wax and Wick
- Adding Aromatherapy Essentials to Your Candles
- Pouring and Setting Your Wellness Candle
- Personalizing Your Wellness Candle Experience
1. Choosing the Right Materials for Your Wellness Candles
Creating your own wellness candles begins with selecting the right materials. Natural ingredients are key to making a calming and health-conscious candle. For the wax, soy wax is a popular option due to its clean burn and environmental benefits. Beeswax is another great choice, offering a purer burn and a natural honey scent. As for the wick, choose cotton or wood wicks for a natural and slow burn. Selecting high-quality materials ensures your wellness candles will not only last longer but also provide a soothing atmosphere without releasing harmful toxins.
2. Preparing Your Wax and Wick
Once you’ve chosen your materials, the next step is to prepare your wax. Begin by melting your wax in a double boiler over low heat. This ensures the wax is heated evenly and without scorching. While the wax melts, prepare your wick. Cut it to the desired length, ensuring it's about two inches taller than the container you'll be using. Secure the wick in place at the bottom of the container using a wick holder or glue dot. This helps keep the wick centered while you pour the wax, creating an even burn.
id="adding-aromatherapy-essentials">3. Adding Aromatherapy Essentials to Your Candles
One of the main reasons people make their own wellness candles is for the therapeutic benefits. Aromatherapy oils such as lavender, eucalyptus, and peppermint can be added to your melted wax to create a calming or invigorating scent. Be sure to use essential oils that are safe for candle-making, and always follow the recommended usage amounts to avoid overpowering scents. For relaxation, lavender is a favorite choice, known for its calming and stress-relieving properties. Alternatively, you could blend your favorite oils to create a personalized fragrance that suits your mood and needs.
4. Pouring and Setting Your Wellness Candle
Once your wax is melted and your oils are mixed in, it’s time to pour the wax into your container. Slowly pour the wax into your prepared container, making sure to keep the wick centered. Leave about half an inch from the top of the container to avoid spills when the candle is lit. Allow the wax to cool and set for several hours at room temperature. Once the candle has solidified, trim the wick to about ¼ inch above the surface of the wax. This will help ensure a clean, steady burn when you light the candle.
5. Personalizing Your Wellness Candle Experience
Making wellness candles is not just about the practical process—it’s about creating something unique and personal. You can personalize your candles by adding dried herbs, flowers, or crystals to the wax. For instance, dried rose petals or chamomile flowers can enhance the aesthetic of your candle and add a subtle fragrance. Crystals like amethyst or rose quartz can add a calming energy to your candle-making experience, offering additional benefits when placed around your candle. By adding these personal touches, your wellness candles will reflect your own style and therapeutic needs.
Now that you know how to make your own wellness candles, why not take your relaxation to the next level? Explore a variety of premium candle-making supplies at Scent Snob, where you can find everything you need to create your own wellness candles at home. Ready to start your candle-making journey? Check out our products and learn more about how you can bring the calming benefits of homemade wellness candles into your daily routine.


0 comments